Application Environment Tutorial
In this tutorial, you will build out an Environment Provider and Environment for containerized applications. In practice, these actions are typically performed by someone in a Platform Engineer role. This Environment Provider will provide the required infrastructure to run containerized applications in an Elastic Container Service (ECS) cluster. The Environment entity will reference the new Environment Providers and will be used by an Application Developer as a target into which they will deploy their applications and microservices.
Create an Environment Provider
We're going to start with creating a new AWS Environment Provider.
In the default OPA on AWS solution used by this tutorial, the Infrastructure as Code source and CI/CD pipelines responsible for provisioning infrastructure have already been created and reside in a GitLab reference repository.
We'll use an AWS ECS Environment Provider template to provision our AWS Elastic Container Service (ECS) runtime environment.
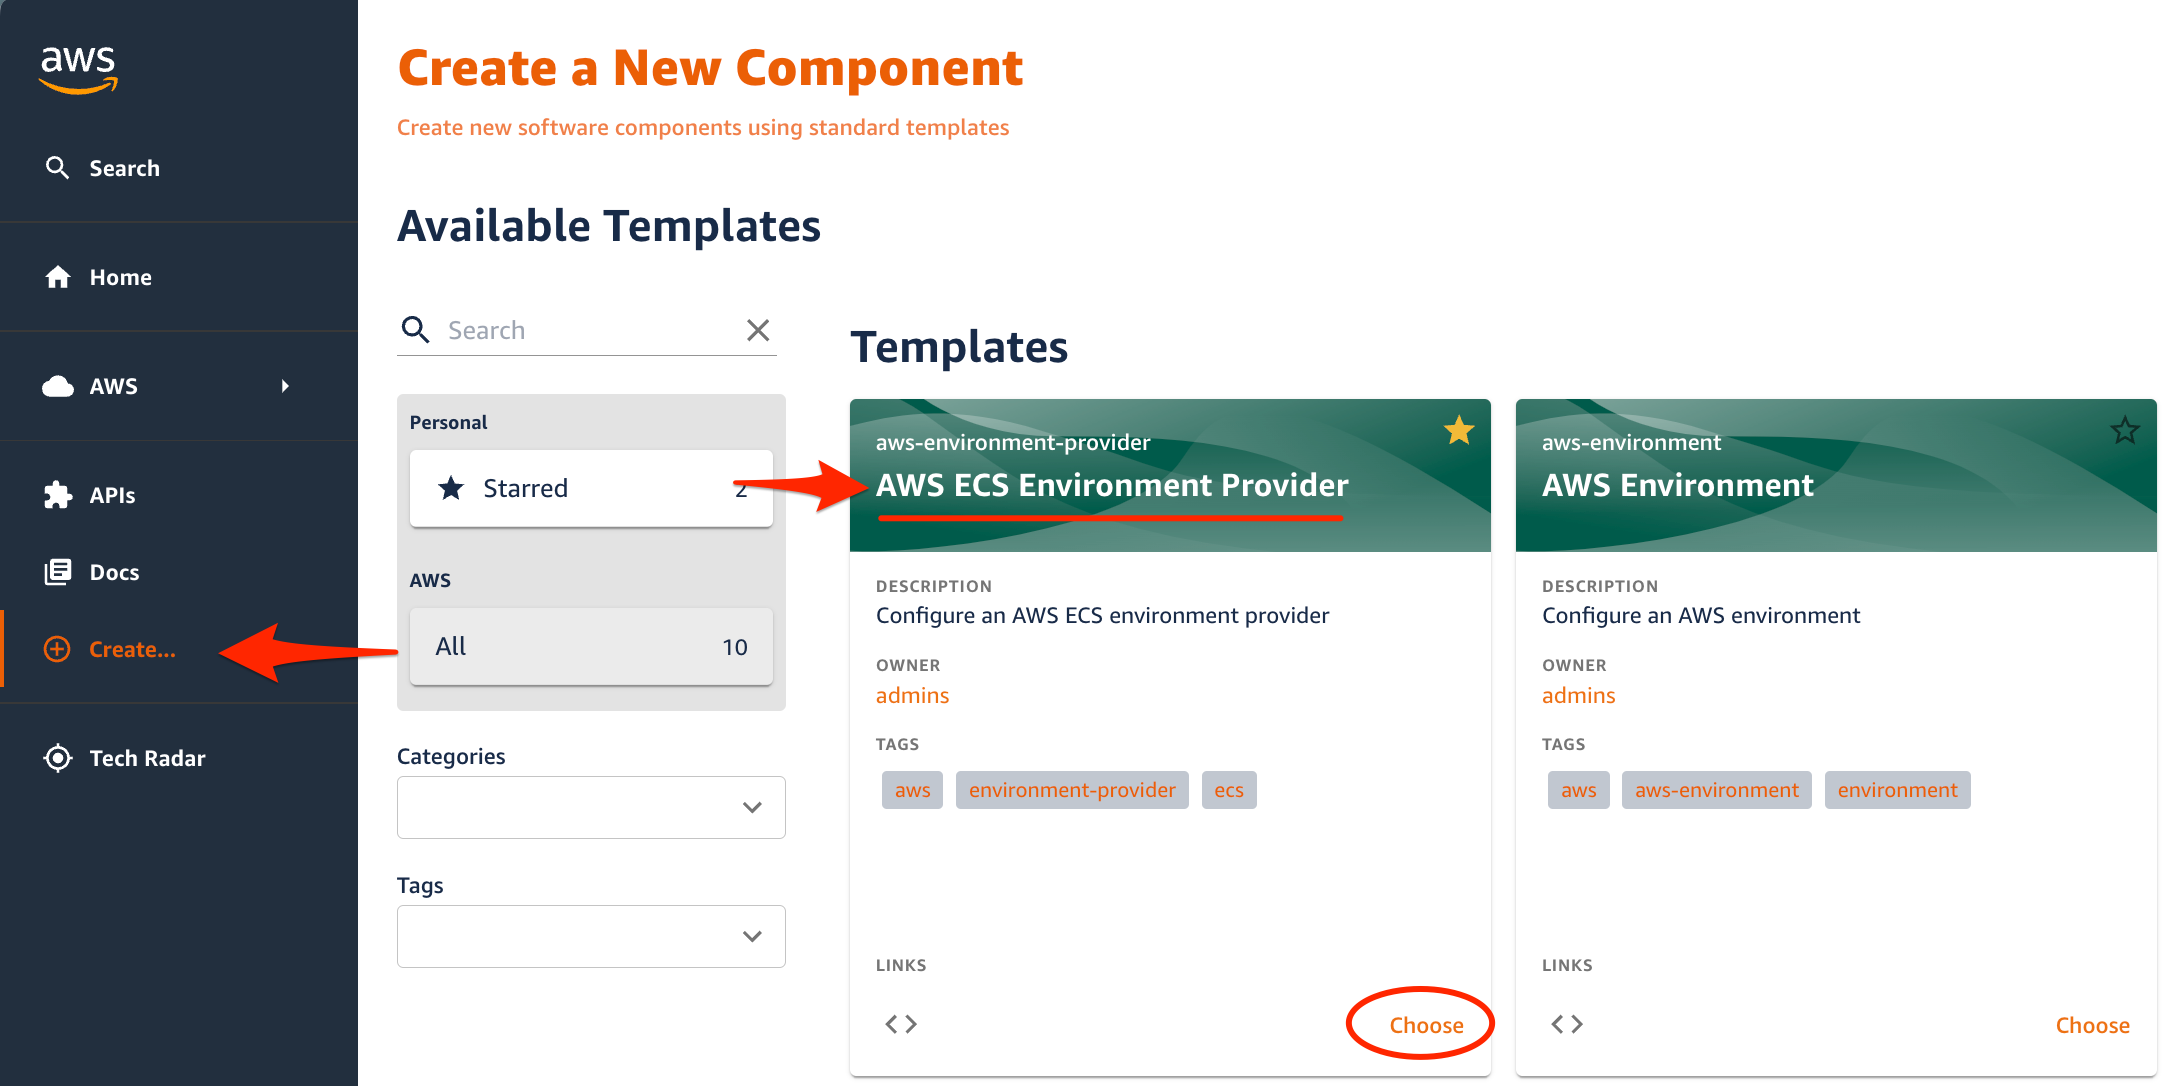
1. Click the Create.. menu on the left and Choose the AWS ECS Environment Provider template.
2. Provide input parameters to tailor the environment provider resources.
| Parameter | Value | Description |
|---|---|---|
| Name | ecs-dev-provider | A unique identifier for the environment provider |
| Prefix | ecsdev | A short prefix used for AWS resource creation |
| Description | A Dev environment provider for containerized applications | Describes what the environment provider's purpose will be |
| Owner | Select a group from the drop-down list to own the Environment Provider | The group or user that will be responsible for the entity |
| AWS Account Number | Enter your 12-digit AWS account id | The AWS account where the environment provider will be created |
| AWS Region | Select the same region where you have deployed the OPA on AWS solution | The AWS region to provision resources in |
| Environment role arn | Enter the ARN of an IAM role with sufficient permission to deploy AWS infrastructure. A sample role named opa-envprovisioning-role was created when deploying the OPA on AWS solution. The ARN format should be similar to arn:aws:iam::{AWS_ACCOUNT_ID}:role/{IAM_ROLE_NAME} | The IAM role to be used for provisioning AWS resources in the target account and region |
| CIDR | 10.0.0.0/24 (default) | The CIDR block to be provisioned for the VPC associated with the ECS cluster to be created |
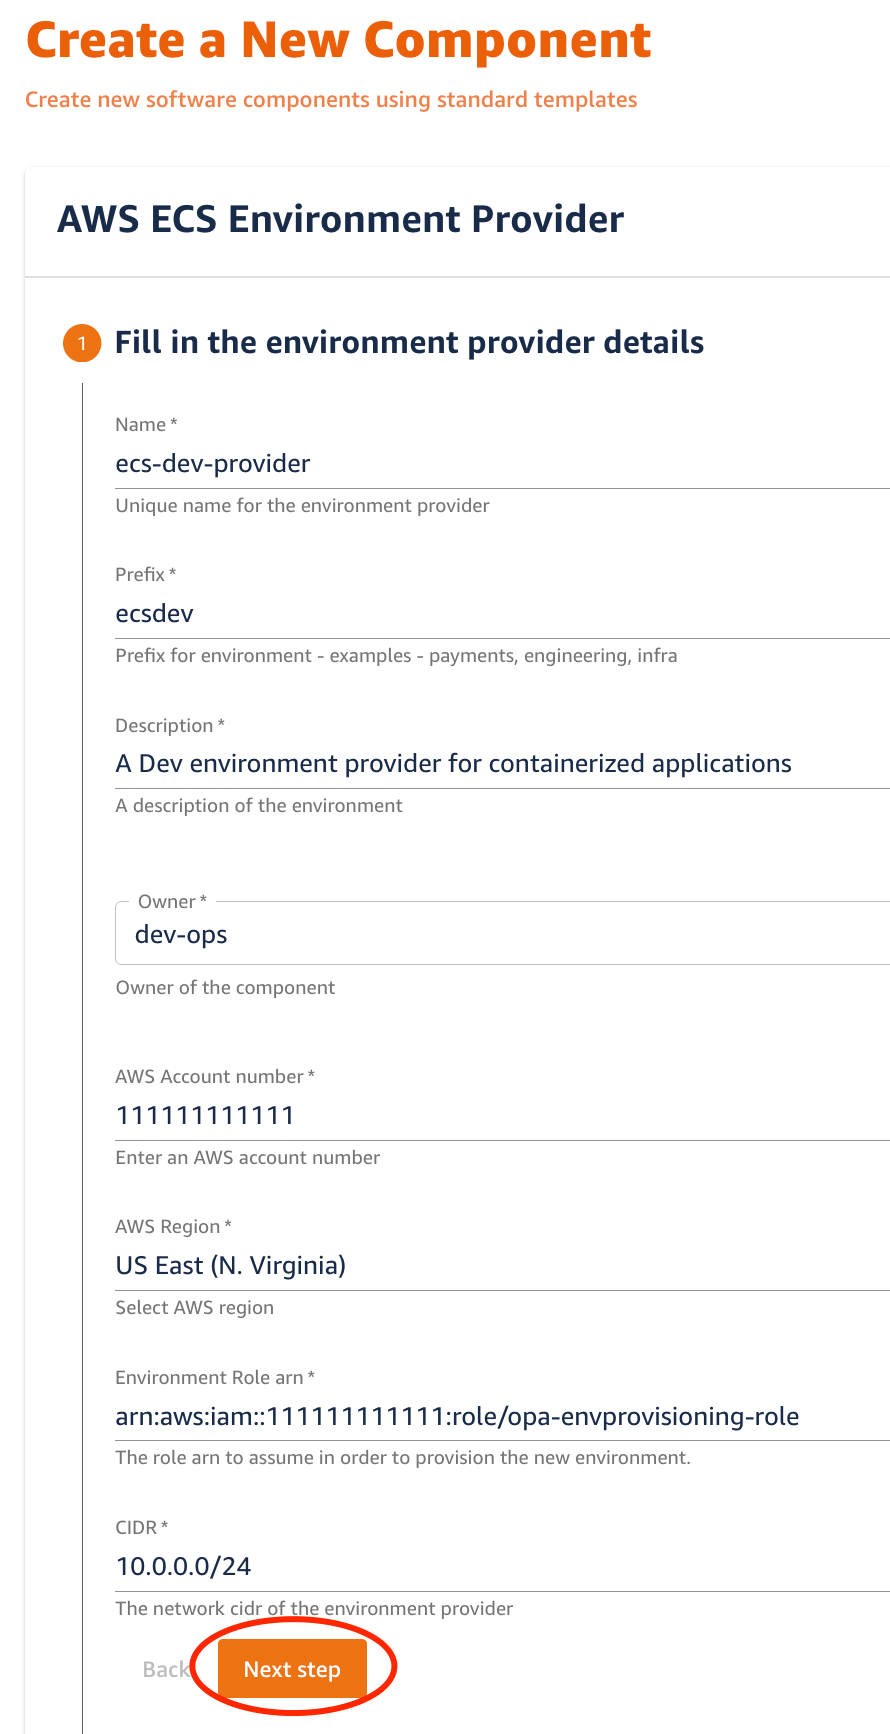
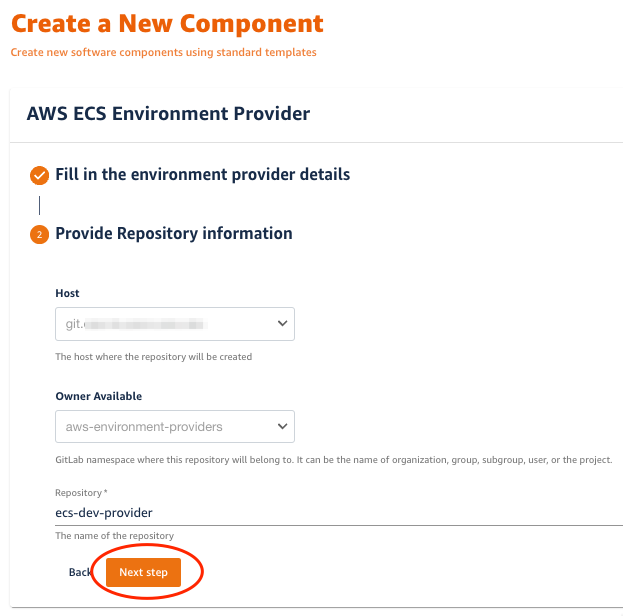
3. Select Next Step and Provide Repository information
In this step we provide information about the git repository where the Environment Provider source files will be published as part of executing the Software Template.
| Parameter | Value | Description |
|---|---|---|
| Host: | default value | The GitLab host name |
| Owner: | default value | The GitLab namespace where this repository will belong to. It can be the name of organization, group, subgroup, user, or the project |
| Repository: | ecs-dev-provider | The name for the git repository |
4. Select Next Step, review your inputs and select Create.
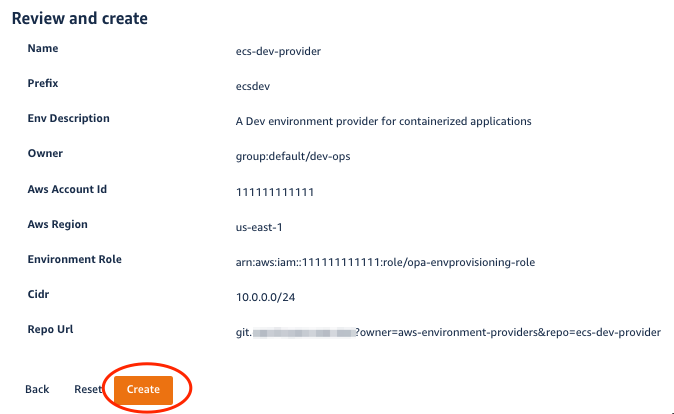
5. Environment Provider Entity Creation
Upon clicking Create, the template starts executing automated action steps. It gets info from AWS, fetches ECS infrastructure code and other configuration files from the reference repository, updates configuration inside these files, and sets up a new git repository to store the files.
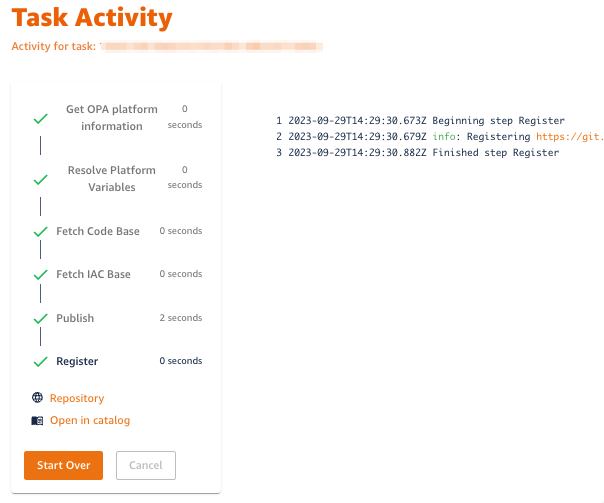
Once this git folder is ready, a CI/CD process will start automatically. It will use the infrastructure code in the git repository to provision your new ECS platform.
Now, let's proceed to the next step to create an environment using the environment provider entity we just created.
Create an Environment
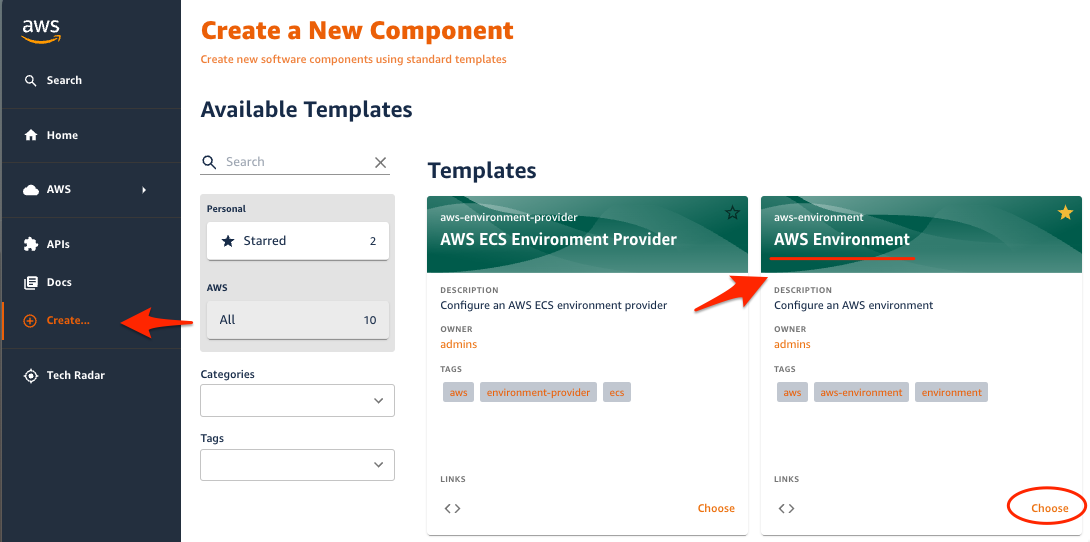
To create an Environment Entity we will use the AWS Environment template from the software catalog section.
1. On the OPA on AWS website, navigate to the Create.. menu. From the list of available templates, choose the AWS Environment template card.
2. Provide input parameters to tailor the environment entity and click Next Step
| Parameter | Value | Description |
|---|---|---|
| Name | ecs-dev | A unique identifier for the environment |
| Short Name | ecsdev | A short identifier used for identification of environments |
| Description | Development environment for containerized applications deployed to ECS | Describes the purpose of the environment |
| Environment Type | AWS ECS | Specifies the type of applications that can be deployed and managed in this environment |
| Deployment Requires Approval | No | Allows for blocking a CI/CD pipeline until approval is received. This is often set to 'No' for development and test, but 'Yes' for production |
| Owner | Select a group from the drop-down list to own the Environment | The group or user that will be responsible for the entity. |
| Account Type | Single-account | Indicates whether the environment supports one or more accounts |
| Region Type | Single-region | Indicates whether the environment supports one or more regions |
| Category | Development | Identifies the intended purpose of the environment (dev, test, prod, etc) |
| Classification | public | Identifies visibility of the environment (public-facing, internal-facing, or private) |
| System | demo | Identifies the relationship of this environment to a larger system. This can be used to group environments together. |
| Hierarchy of the Environment | 1 | Value used to determine relative ordering for environments. Typical approaches are to use lower numbers for development and higher numbers for production. |
| Providers | ecs-dev-provider | Selects one or more environment providers to attach to this environment. In this tutorial, there may only one environment provider available, so the drop-down list is disabled and the available environment provider will be used. |
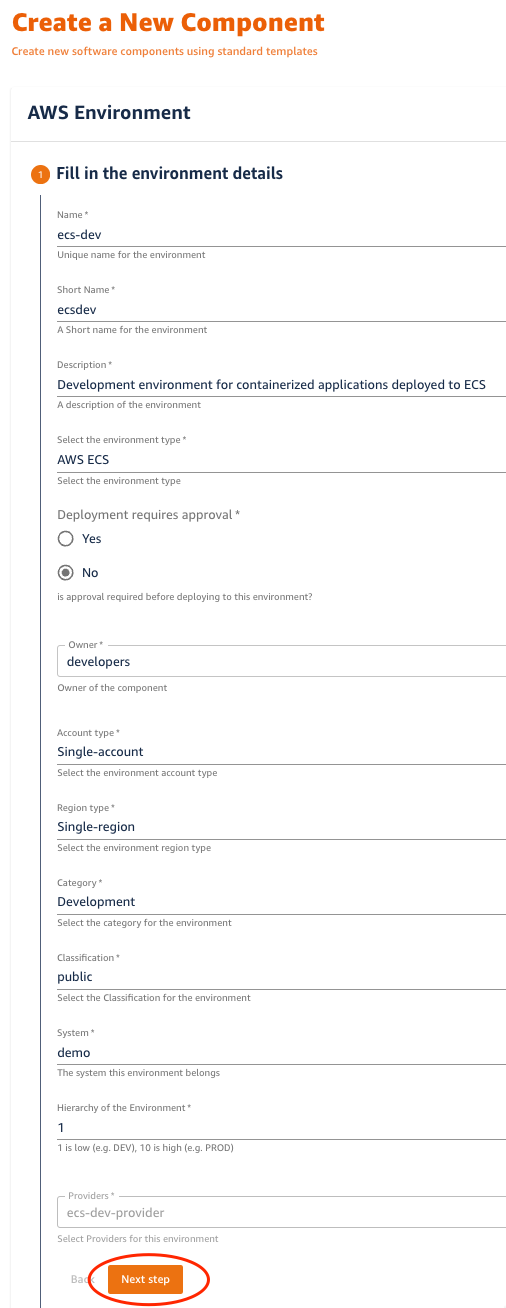
2. Click Next Step and fill in the remaining information:
| Parameter | Value | Description |
|---|---|---|
| Host | default value | The GitLab host name |
| Owner | default value | The GitLab namespace where this repository will belong to. It can be the name of organization, group, subgroup, user, or the project |
| Repository | ecs-dev | The name for the git repository |
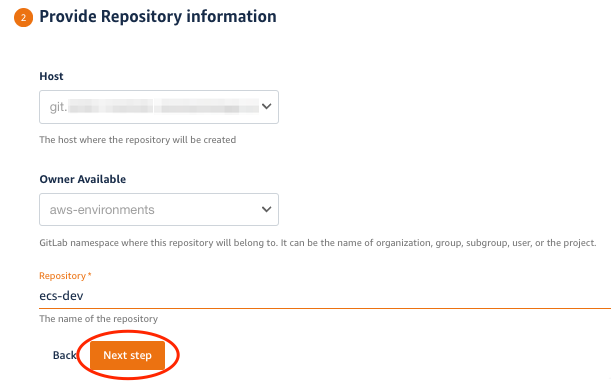
3. Click Next Step and review your inputs. Click Create
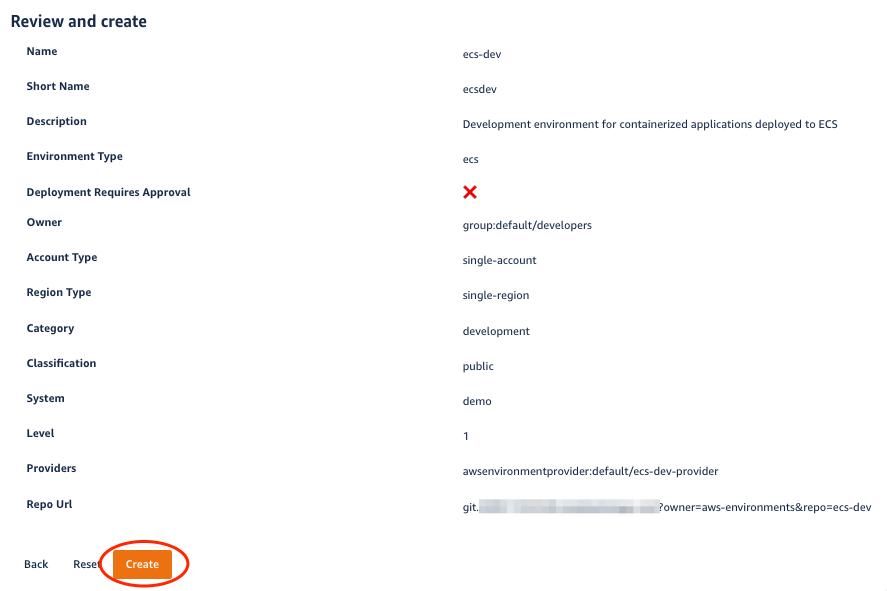
4. The template scaffolding action will fetch a catalog-info.yaml file (used to define entities), replace the placeholders with our input we just provided, push the file to a new repo, and register it to the Backstage catalog.
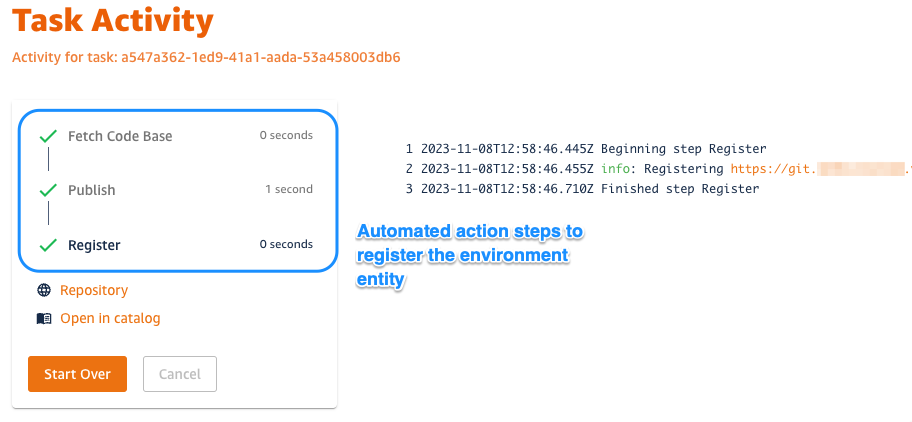
Now that our Environment Entity is created, our developers can discover and point to the it during their app scaffolding process. Let's proceed to the next step and explore the ECS Environment Entity we just created.